How To Remove Internal Doors
This is not a particularly difficult job, but you will need someone to help simply because of the size and weight of the door.
- Prop the door up in the open position with wedges under the door.
- Remove any paint from the screws in the hinges on the door frame with a screwdriver. Tap gently on the end with a hammer to dislodge any stubborn paint.
- Loosen the screws in the hinges on the door frame but don’t unscrew them completely at this point.
- Now remove the screws from the bottom hinge completely. Ask your assistant to hold the door so that it doesn’t twist or swing back.
- Move on to the top hinge, again using help to ensure that the door doesn’t fall suddenly.
If you want to reuse the hinges, you can now place the door flat on trestles and remove them from there. However, hinges and screws are not expensive and rather than going to the trouble of stripping the paint from the old ones, you may as well buy new ones when you buy your new doors.
If you want to reuse the door’s hardware (locks, knobs, handles), you can either remove these before you take the door from the frame (when it’s propped in place with wedges) or you can lay it flat on trestles to remove them.
How To Find The Right Size Replacement Internal Door
A common misconception many people believe is that you should can just measure your existing interior door when looking to replace it. Don’t be tempted to measure your existing door – you don’t know what adjustments may have been made when it was originally fitted. Instead, take all measurements between the frame jambs (the uprights framing the door opening), and the floor and the top of the frame. Measuring the space ensures you will buy the right sized door to fit.
How to Measure For New Internal Doors
Tools required
A tape measure, a square, someone to assist, pencil and paper.
- Check the door width. Have someone on hand to help you so that you hold the tape measure taut and parallel to the floor. Take three measurements: one near the top of the door, one around the middle and one near the bottom of the door. Record all three carefully. Take each measurement twice to be sure you’re reading the tape measure accurately. Measure to the nearest millimetre.
- Check the door height. As with the width, take three measurements: one near the hinge side of the door, one in the middle, and one near the lock edge.
- Decide which measurements to use. Choose the widest and longest of each of the measurements to determine what door size you need to look for. It is usual to allow a 2mm gap between the door and the door frame and a 6mm gap between the door and the floor, although this can be adjusted depending on your floor covering.
Standard door heights in the UK are 1981mm (6ft 6in) although some are also available up to 2040mm (6ft 8in). If you really do have particularly tall doors, many manufacturers will make bespoke doors to fit. You could also consider bricking in the gap at the top or fitting a transom window (a window above the door) in the extra space if you want more. Taller or shorter tend to be found in custom designed homes or very early period properties, so for the majority won’t be an issue.
There is a greater choice available when it comes to door width but the standard internal door in most UK homes is 762mm (2ft 6in). Always measure your door space however rather than relying on standard door sizes.
When you hang your new door, it doesn’t matter if it’s slightly bigger as you can shape it as you go. It’s better to be slightly bigger than too small. It is standard practice to plane off a few millimetres as required to ensure a snug fit. Take care if buying a hollow-core door though as you won’t want to plane through to the hollow centre by taking too much off. Choose a door size as close as possible to your measurements. - While you are busy checking and recording your door’s linear measurements, it’s also worthwhile using your square to check if the angles in the frame are square – at 90 degrees. Don’t worry if they’re not – most aren’t – as you can make slight adjustments as you plane your door to fit.
How To Add Hardware To Internal Doors
If you’re going to replace your interior doors to enhance your décor, it makes sense to buy new door furniture at the same time. A quick glance along the shelves at your local DIY store or online will show you the huge range that you can choose from, with an equally wide range of prices to match.
Metal finishes remain the most popular, but you are no longer restricted to chrome and gold. Rose gold, copper and brass coloured finishes have all become fashionable of late and are available in shiny, satin or matte variations. Other options include decorative ceramic door knobs, and you can also choose between round or level style handles.
Tools required
New door handle set, chisel, screwdriver, hand level, hammer.
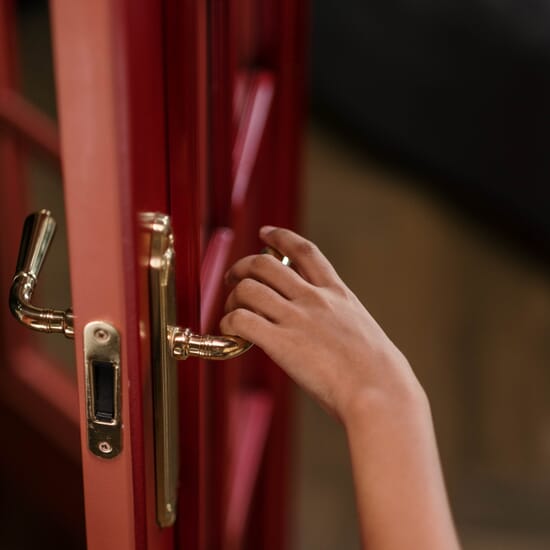
- Remove the old door knob by gently turning its face plate (sometimes called the rosette) to remove and expose the door mechanism. Remove any screws and pull off the door handle on both sides. Remove the pawl (this is a kind of “tongue” that makes the door click).
- Remove the screws in the strike plate (the metal plate on the door frame, not the door) and pry gently away from the door. If adding a new strike plate of a different size, use a chisel and hammer to carefully remove any excess wood to fit the shape of the new strike plate and then screw this in position.
- Add the new pawl and screw in place. Use a small hand level to check it is level.
- Position the handle in the right place (check they are facing the right direction) and tighten the screws, ensuring that both sides of the door handle are level. Add the new face plate to complete the fitting.
How To Hang The New Interior Door
We have a more detailed article on how to fit and adjust an internal door, but here’s the basic steps on how to hang the new door.
- Mark the door so that you know which is the top and which side will have the hinges and which the lock. It is very easy to get these confused during fitting.
- Check the width of your door opening (see finding the right size replacement door advice above) and compare these to the width of your new door.
- Carefully plane off the required amount from the edges for the door to fit. You should plane equal amounts from each side to retain the door’s symmetry.
- Hold the door in position to check that the top is parallel to the top of the frame. If not, measure the gap at the wider end and plane the top in a gentle slope to fit.
- Determine whether or not the leading edge of the door (where the lock will sit) needs to be planed at a slight angle to accommodate the increased radius when opening and closing the door, and if so, plane this gently.
- Fit the bottom edge by holding the door in place and marking a line along the door 6mm up from the floor. Now saw or plane off the appropriate amount.
- The uppermost hinge should start 150mm from the top edge, while the bottom hinge begins 200mm up from the bottom edge. Mark their positions on the door and then use a chisel to remove the appropriate depth for them to fit exactly. Screw them in place.
- Hold the door in place and mark the positions for the hinges on the door frame. Screw in place.
In Summary
Now you’ve seen what’s involved in this project, you can decide whether or not this is something you want to do for yourself. If you’re replacing several doors at once, you might decide to call in a professional. A joiner is used to doing this job every day and will make quick work of what might be a steep learning curve if you haven’t done this before. However, if you’re confident enough to give it a go, use our instructions to guide you through.


